Bleeds (Page Bleeds)
Bleeds (Page Bleeds)
What is Bleed?
Bleed is an extra part of an image that extends past the trim line of a document that will be cut off. This ensures that the image will extend to the edge of the finished page once it has been cut.In the example on the left, the red dashed line shows the final trim size of this picture, which will be cut to 4 x 4. The area outside the red dashed line is the bleed. The blue line shows the safe print zone, which is an area that extends in from the trim area about 1/4 inch. This will ensure that text and images won’t be cut into accidentally during trimming.

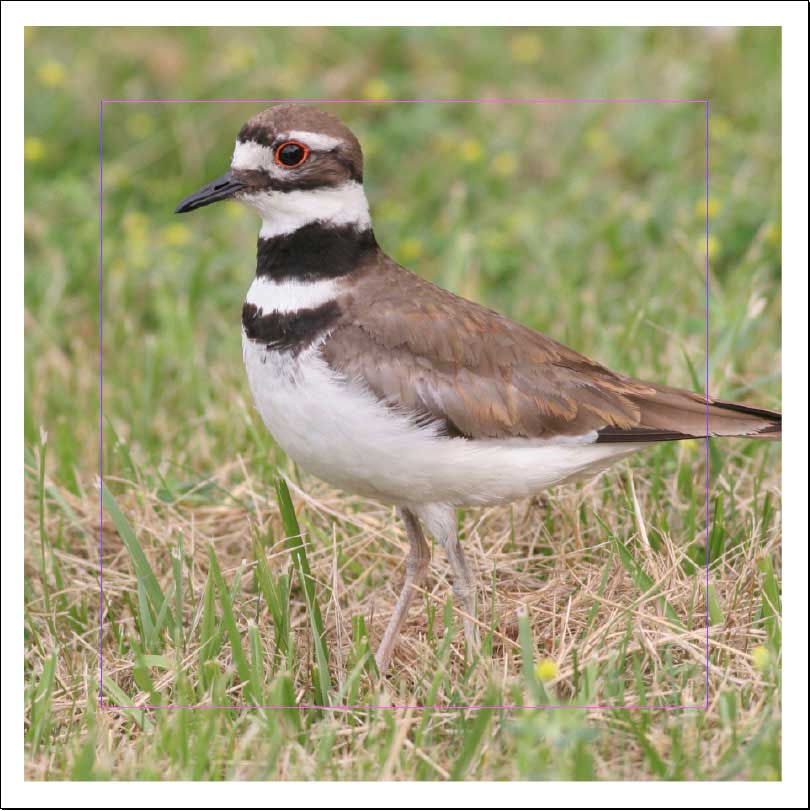
The example on the right does not require any bleed, since the image does not extend to the edge of the trim size, which is 4 x 4. They kept a white border around the image, and the file was set up the exact size of the finished sheet.
When is Bleed needed?
Bleed is needed anytime that an image or shape is supposed to extend to the edge of a sheet once it has been cut. If you have a brochure, for example, that has a background color that extends to all 4 edges of the sheet, you need bleed. If your brochure is supposed to have a white border around it where nothing will be printed, that would not require bleed.What is Bleed for?
Bleed is for making sure that an image extends to the edge of a finished piece once it has been cut. Without bleed, any variation when cutting a stack of paper could result in an image not extending completely to the edge of the paper and a thin white line showing between the paper edge and the image.Bleed is usually defined as 1/8 inch (.125) extra on each side of the document, making the document .25 inches larger horizontally and vertically. For example, an 8.5 x 11 finished size would be 8.75 x 11.25 with the bleeds. Some design programs (Indesign, Quark, later versions of Illustrator) give options for how much bleed to add to the page, while others (Photoshop, Publisher, Word) don't have any options like that. For the programs that don't have those options, bleed needs to be defined manually by enlarging the page size .25 inches both horizontally and vertically, and then making sure that in your design you have guides that show you where the page will actually be cut at so you can set up your design correctly.
Creating Bleeds
Indesign
In the document setup window, change the bleed options to .125 inches.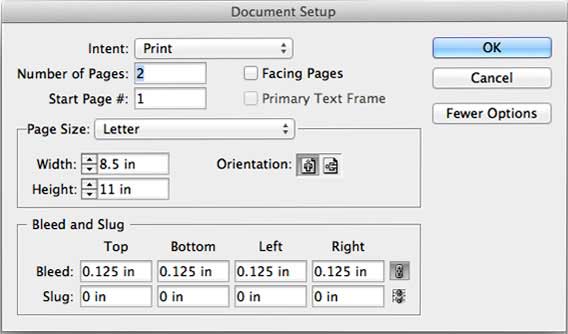
Illustrator
Versions that support bleed settings: Set bleeds in the document setup window.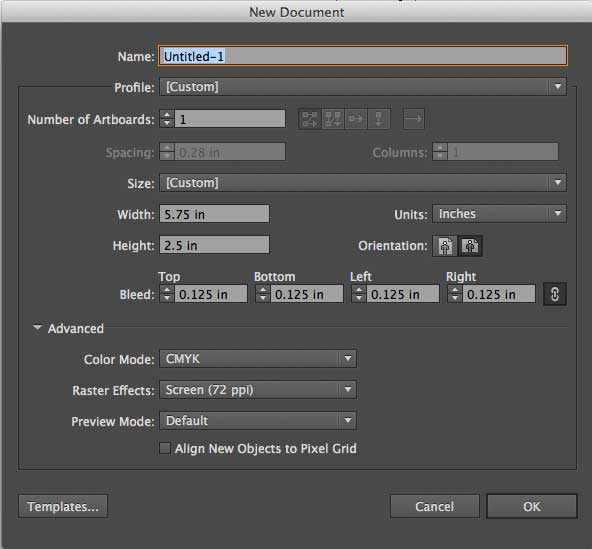
Version that do not support bleed settings: Set document size to .25 inches larger both horizontally and vertically, and create guides to show where the bleed is.
Photoshop, Word, Publisher, or any other program that does not support bleed settings
Set document size to .25 inches larger both horizontally and vertically, and create guides to show where the bleed is (.125” from each edge)